Sep 7, 2023

The Art of Sewing: Unraveling the Threads of Creativity


Note: This post may contain affiliate links. As an Amazon Associate, I earn from qualifying purchases. 

In a world driven by technology and fast-paced living, there's something deeply satisfying and even therapeutic about slowing down, working with your hands, and creating something beautiful from scratch. Give me a few hours to play with my crafts and I'm happy!  One timeless craft that really enjoy, next to paper crafting and memory keeping is sewing. Whether you're a complete beginner or someone looking to rekindle their love for this art form, sewing offers numerous benefits that extend far beyond the final stitch. I hope this post inspires you to get started on your creative journey. 

The Art of Sewing

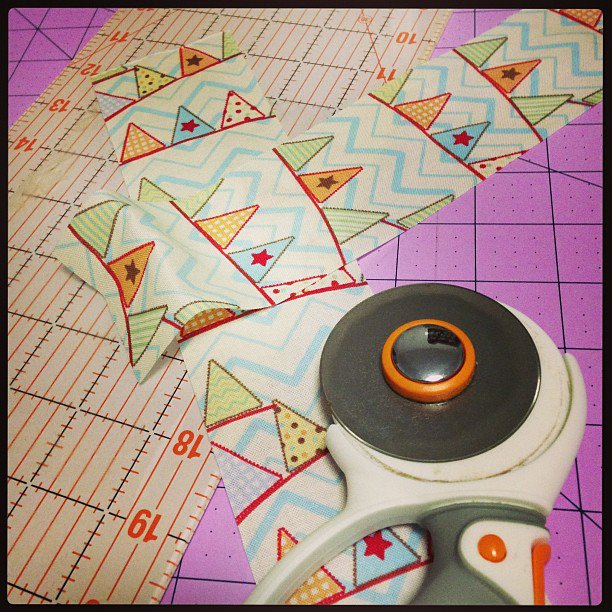
Sewing is a versatile and age-old craft that involves joining fabrics together using a needle and thread. From stitching up a tear in your favorite shirt to crafting intricate garments, quilts, and home décor items, sewing offers endless possibilities for creativity. While it may seem intimidating at first, anyone can learn to sew with practice and patience.


Benefits of Sewing

1. Creative Expression: Sewing provides a unique outlet for creative expression. You have the power to choose fabrics, colors, and patterns, allowing you to bring your vision to life. Whether you're making clothes, accessories, or home decor items, sewing lets you infuse your personality and style into your creations.

2. Mental Well-being: Engaging in sewing can have a calming and meditative effect. The repetitive and rhythmic nature of stitching can reduce stress, improve focus, and enhance your overall mental well-being. Many sewists find it therapeutic and a great way to unwind after a long day.

3. Sustainability: In a world increasingly concerned with environmental issues, sewing empowers you to make sustainable choices. You can repurpose old clothes, mend damaged items, or create your own eco-friendly fashion and home accessories, reducing your carbon footprint in the process.

4. Cost-Efficiency: Sewing can be cost-effective in the long run. Instead of constantly buying new clothes or home items, you can make your own, often at a fraction of the cost. Plus, you'll have the satisfaction of knowing you made it yourself.

5. Customization: Finding the perfect fit or design in ready-made items can be a challenge. Sewing allows you to tailor garments to your body shape and preferences. You can also make unique gifts for loved ones, adding that personal touch to every present.


Essential Sewing Tools for Beginners

Getting started with sewing requires a few essential tools and supplies. Here's a list to help you begin your sewing journey:

1. Sewing Machine: While you can start with hand sewing, a sewing machine will significantly speed up your projects. Look for a beginner-friendly, easy-to-use machine with basic features.

2. Needles and Thread: A variety of sewing needles, suitable for different fabrics, and a selection of high-quality threads in various colors are essential.

3. Fabric: Choose fabrics appropriate for your projects. Beginners may want to start with easy-to-sew materials like cotton.  If your project needs some stability, make sure you get the right stabilizer.

4. Scissors and Cutting Tools: Invest in a good pair of fabric scissors and rotary cutters for precise cutting.

5. Pins and Pin Cushion: These will help you hold fabric pieces together while sewing.

6. Measuring Tape: Essential for accurate measurements and sizing.

7. Iron and Ironing Board: Pressing seams and fabric before and after sewing is crucial for a professional finish.  An alternative to the bulky ironing board are Wool Pressing Mats that come in different sizes and give you nice crisp seams.

8. Pattern and Notions: If you're working from a pattern, make sure to have all the necessary notions such as buttons, zippers, and elastic.

9. Sewing Box: A container to organize and store your sewing tools is a handy addition.

Sewing is more than just a practical skill; it's a timeless art form that offers numerous benefits, from creative expression to mental well-being and sustainability. With the right tools and a willingness to learn, you can embark on a rewarding journey of self-expression and creation. So, gather your sewing supplies, choose your first project, and start stitching your way to a world of creativity and fulfillment.

Happy sewing!

Sep 6, 2023

Holiday Paper Crafting: DIY Lip Balm Tag


Note: This post may contain affiliate links. As an Amazon Associate, I earn from qualifying purchases. 

The holiday season is right around the corner - it's the perfect time to dust off your supplies and start getting creative to add that personal touch to your gifts this year! One delightful way to do this is by crafting your own lip balm tags. These tags not only add a festive flair to your lip balm gifts but also show your loved ones that you care. In this step-by-step tutorial, we'll guide you through the process of creating a charming holiday lip balm tag.

**Materials You'll Need:**
- Colored or patterned cardstock paper (holiday-themed is a bonus!)
- Scissors
- Ribbon or twine
- Lip balm containers
- Glue or double-sided tape
- Markers, stamps, or stickers for decorating
- Optional: holiday-themed embellishments (e.g., stickers, glitter, or small ornaments)

**Step 1: Prepare Your Materials**
Gather all your materials to ensure a smooth crafting process. Choose cardstock paper that matches the holiday theme you desire for your tags.  I used Kraft cardstock in this project.

**Step 2: Cut Out Tag Shapes**
Using your scissors, cut out tag shapes from the cardstock paper. The size of your tags should be large enough to accommodate your lip balm containers comfortably.  If you have a die cut machine like the Sizzix Big Shot, you can use tag dies like the My Favorite Things Tall Tag Duo to save time on cutting.

**Step 3: Personalize Your Tags**
Now, it's time to get creative! Decorate your tags using markers, stamps, stickers, or any other embellishments you have on hand.  Consider adding festive messages, holiday-themed images, or personal touches like the recipient's name.

**Step 4: Create a Hole for the Lip Balm**
Use a craft knife to create a hole in each tag to place your lip balm.  I love using the My Favorite Things die to cut out the lip balm window because it works perfectly with their Lip Balm Pouches that is adhered using double sided tape.  Place your lip balm inside the pouch and secure the window to your tag.

**Step 5: Add a Festive Ribbon or Twine**
Thread a ribbon or twine through the hole in the tag.  Here I used a striped ribbon with some twine to add a festive touch.

**Step 6: Final Touches**
Take a moment to ensure everything is secure and looks appealing.  Add any embellishments like stickers, glitter, or small ornaments to make your tags even more festive.  This cute polar bear is from MFT Bitty Bears stamp set.

**Step 7: Repeat for More Tags**
Repeat the above steps for as many lip balm tags as you need. You can create a variety of designs to suit different recipients and occasions.


**Share the Joy**
Creating your own holiday lip balm tags adds a personal and heartfelt touch to your gifts. It's a fun and creative way to spread joy during the holiday season. Plus, it shows your loved ones that you put thought and effort into their presents. Get crafting, and enjoy the smiles on the faces of those who receive your thoughtful gifts! Happy holidays and happy crafting!

Sep 5, 2023

The Ultimate Crafting Companion: We R Memory Keepers Crop-A-Dile Review


Note: This post may contain affiliate links. As an Amazon Associate, I earn from qualifying purchases. 

Crafting enthusiasts know that the right tools can make all the difference in bringing creative visions to life. One such tool that has gained a reputation for its versatility and convenience is the We R Makers (aka We R Memory Keepers) Crop-A-Dile. I have owned my crop-a-dile for over 12 years!  I'll dive into a detailed review of the Crop-A-Dile and explain why it's my favorite tool for crafting!  

The We R Makers Crop-A-Dile is a compact and powerful tool designed to punch holes, set eyelets, and even snap metal snaps with ease. Its versatility is one of its standout features, making it an essential tool for various crafting projects, from scrapbooking to card making and beyond.

Key Features

Here are some of the key features that make the Crop-A-Dile a must-have for crafters:

1. Dual-Purpose Tool: The Crop-A-Dile is not just a hole puncher; it's also an eyelet setter. With two different hole sizes (1/8-inch and 3/16-inch), you can create holes in various materials, including paper, chipboard, leather, fabric, and even thin metal.

2. Eyelet Setting: Setting eyelets can be a finicky process, but not with the Crop-A-Dile. It effortlessly punches the hole and sets the eyelet in one smooth motion, ensuring a secure and professional finish.

3. Quiet Operation: Unlike traditional hole punchers, the Crop-A-Dile operates quietly, making it a great choice for crafting late at night or in shared spaces.

4. Adjustable Hole Punching: The Crop-A-Dile features an adjustable measurement guide that allows you to precisely space holes in your projects, ensuring perfect alignment every time.

5. Easy-to-Use: Its ergonomic design and comfortable grip make it easy to handle, even for extended crafting sessions. The built-in storage compartment keeps eyelets and snaps organized and easily accessible.

6. Durability: I appreciate the Crop-A-Dile's sturdy construction, as it's built to withstand heavy use and last for years...mine is going on 12+!

Crafting with the Crop-A-Dile


Let's take a closer look at how the Crop-A-Dile can be used in various crafting scenarios:

1. Scrapbooking: Create custom scrapbook pages with neatly punched holes for binding or decorative eyelets to add flair to your layouts.

2. Card Making: Add eye-catching eyelets to your handmade cards for a polished look, or use the Crop-A-Dile to punch holes for ribbon or twine embellishments.

3. Leatherwork: Whether you're making leather journals, keychains, or wallets, the Crop-A-Dile can handle leather materials effortlessly.

4. Clothing and Accessories: Use it to set snaps on fabric projects like clothing, bags, or home decor items.

5. Home Decor: Add hanging hardware to home decor pieces such as picture frames or wall art.

This is my all-time favorite tool! I use it in my paper craft projects, sewing projects, memory keeping and journaling projects.  Its ability to punch holes, set eyelets, and snap metal snaps makes it an invaluable asset for a wide range of crafting projects. Whether you're a seasoned crafter or just starting your creative journey, the Crop-A-Dile will quickly become your go-to tool for adding that professional touch to your creations. 

Tell me what your favorite craft tool is that you can't live without!

Happy Crafting!

Sep 4, 2023

Sublimation on Cups: Personalize Your Sips with Style


Note: This post may contain affiliate links. As an Amazon Associate, I earn from qualifying purchases. 

In the world of personalized gifts and custom merchandise, sublimation printing on cups has emerged as a popular and creative way to add a personal touch to your drinkware. Whether you're a business owner looking to offer unique merchandise or an individual looking for a special gift, sublimation on cups is a versatile and visually appealing option. In this blog post, we'll explore the fascinating world of sublimation printing on cups and discover why it's becoming the go-to choice for customization.

What is Sublimation Printing?

Sublimation printing is a heat-based transfer process that allows vibrant, full-color designs and images to be permanently infused into various materials, including ceramics, polyester fabrics, and specially coated surfaces. The key to sublimation's magic lies in its ability to transform a design from a solid to a gas state without passing through a liquid stage, ensuring a high-quality, durable print that won't fade or peel.

The Cup as a Canvas


Cups, mugs, and tumblers have become popular canvases for sublimation printing due to their widespread use and the limitless possibilities they offer for customization. Here are some reasons why sublimation on cups is gaining momentum:

1. Endless Design Options: Sublimation allows for intricate and detailed designs, including photographs, illustrations, logos, and text. You can create personalized cups for any occasion, from weddings and birthdays to corporate events and promotional giveaways.

2. Vibrant and Durable Prints: Sublimated designs become part of the cup's surface, resulting in sharp, vivid, and long-lasting prints. The colors won't fade or scratch off, even after multiple uses and washes.

3. Versatile Material Compatibility: Sublimation works exceptionally well on ceramics, porcelain, and coated polymer cups. This versatility means you can choose the cup material that best suits your needs and budget.

4. High-Quality Photo Reproduction: Sublimation is ideal for transferring high-resolution photos onto cups. It captures the nuances of colors and details with precision, making it perfect for treasured memories and gifts.

5. Personalized Gifts: Customized cups make thoughtful gifts for loved ones. You can add a personal touch with someone's name, a heartfelt message, or a cherished photo, turning a simple cup into a cherished keepsake.

6. Branding and Marketing: Businesses can use sublimated cups as promotional items, enhancing brand visibility and leaving a lasting impression on clients and customers. Custom cups are also excellent additions to merchandise offerings.

How the Process Works

Sublimation on cups involves several steps:

1. Design Creation: Start by designing or selecting the artwork you want to print on the cup. Make sure it fits the cup's dimensions and that the colors are vibrant and eye-catching.  You can find many designs on Etsy!

2. Printing: Using sublimation ink, print the design onto sublimation transfer paper. Ensure the design is mirrored or flipped horizontally as it will be transferred in reverse. 

3. Heat Press Transfer: Secure the sublimation transfer paper onto the cup using heat-resistant tape. Place the cup in a specialized heat press machine, which applies heat and pressure to transfer the design onto the cup.  I personally use this heat press:

4. Cooling and Quality Check: Allow the cup to cool, peel off the transfer paper, and inspect the print for quality and adherence. You'll be amazed at how the design fuses seamlessly with the cup's surface.

5. Final Touches: Clean the cup, ensuring it's free from any residual ink or adhesive. Your custom sublimated cup is now ready to be enjoyed or gifted.

I especially love the look of sublimation on frosted beer glasses, along with the skinny tumblers for keeping my drinks cool in the hot Hawaii sun!  I've found my blanks here.

Sublimation printing on cups is a versatile and visually appealing way to personalize your drinkware, commemorate special moments, and promote your brand. With its vibrant and durable prints, endless design options, and compatibility with various materials, sublimation has become a go-to choice for those looking to add a personal touch to their sips. Whether you're an individual creating a unique gift or a business owner seeking promotional merchandise, sublimation on cups offers endless possibilities for creativity and customization. So, raise your personalized cup and enjoy a sip of creativity and style!

Happy Crafting!

Favorite Paper Crafting Tools


Note: This post may contain affiliate links. As an Amazon Associate, I earn from qualifying purchases. 

Paper crafting is a versatile and captivating form of crafting, offering endless possibilities for creativity. While the act of crafting itself is rewarding, having the right tools can elevate your paper crafting experience to new heights. Here are some of my favorite paper crafting tools that can enhance your projects and make the creative process even more enjoyable:

1. Precision Cutting Tools: A reliable and sharp paper trimmer is essential for achieving clean, straight cuts in paper. Craft knives and cutting mats are also handy for intricate cutting and precise trimming.

2. Scissors: High-quality scissors are a must-have for paper crafting. They should be comfortable to hold and capable of cutting through various paper weights with ease. Detail scissors with fine points are perfect for intricate cuts, or fussy cutting.

3. Adhesives: Choose from an array of adhesive options, such as double-sided tape, glue sticks, liquid glue, and foam tape. The right adhesive ensures that your paper elements stay securely in place while maintaining a polished look.

4. Paper Punches: Paper punches come in a wide range of shapes and sizes, allowing you to create consistent and intricate shapes effortlessly. They are excellent for making embellishments and decorative elements.

5. Stamping Supplies: Stamps, ink pads, and markers open up a world of possibilities for adding designs, patterns, and sentiments to your paper projects. Experiment with different colors and stamping techniques to personalize your creations.

6. Scoring Board: Scoring boards are invaluable for creating precise and neat folds in paper, essential for making cards, envelopes, and 3D paper structures like boxes and bags.

7. Decorative Papers: Stock up on a variety of decorative papers, including patterned paper, cardstock, vellum, and specialty papers. These materials provide the foundation for your paper crafting projects.  As a standard base, my all-time favorite cardstock to use is the Neenah White 110lb Cardstock.  It's perfect to stamp on and the weight (gsm) of the paper is sturdy.

8. Embellishments: Sequins, buttons, rhinestones, and ribbon can add flair and sparkle to your paper crafts. These embellishments allow you to customize your projects and make them uniquely yours.

9. Crafting Brushes and Blending Tools: If you're into techniques like ink blending and distressing, soft-bristle brushes and blending tools are essential for achieving smooth and gradient effects.

10. Die-Cutting Machine: Die-cutting machines are a game-changer for paper crafting. They allow you to cut intricate shapes, letters, and designs quickly and consistently using metal dies or electronic files.

11. Storage Solutions: Organizational tools such as paper racks, storage boxes, and drawer units can help keep your paper crafting supplies tidy and easily accessible. An organized crafting space can boost your creativity and productivity.

12. Bone Folder: A bone folder is a simple yet invaluable tool for creating crisp, professional-looking creases and folds in paper.

13. Heat Gun: Essential for heat embossing and drying inks, a heat gun is a versatile tool in paper crafting.

14. Crafting Mat: A self-healing cutting mat protects your work surface and prolongs the life of your cutting tools while providing accurate measurements and guides.

These favorite paper crafting tools not only make the creative process smoother but also enhance the quality of your finished projects. Remember that while having the right tools is important, the most vital ingredient in crafting is your creativity and imagination. So, gather your tools, explore new techniques, and let your paper crafting projects come to life. Happy crafting!

May 10, 2012

Sister Stamps Release #8

Sister Stamps will be celebrating their 1 year anniversary soon...what better way then to celebrate with Mariko, Miyoko & Takeo?  Introducing Sister Stamps Release #8, which is scheduled for July 1, 2012.

These are available now for Pre-Order!  Place your orders by May 31 and you'll get $1 OFF each stamp.

To place your orders, please visit our NEW Online Store HERE!!

Existing Customers - We were unable to transfer your customer profile to this new site, therefore please take a few minutes to REGISTER for a new account. We apologize for this inconvenience.

You'll love the added features of this new site that we did not have the capability to do on our old website:
  • Lower Prices
  • Larger thumb nail pictures of products
  • Additional photos showcasing samples using the products
  • Ability to enter in COUPON CODES
  • Adding items to your Wish List
  • Share your favorite products on Facebook & Twitter
We hope you like the new site. We are currently working on adding additional items, so please bear with us during this construction phase.  We wanted to upload at least the Sister Stamps so that you could take advantage of this exceptionally GREAT pre-order Special!


Mar 1, 2012

Sister Stamps Release #7

Boy...we're on Release #7 already for Sister Stamps!!! There are never enough boy stamps out there..until now! These cuties are scheduled to release on April 7th and we're offering you a Pre-Order special of 10% off the lowest retail pricing of Sister Stamps.


Please visit our online store HERE to place your orders by March 11 to save 10% Off!

Crafting Success: Craft Fair Checklist for Packing Essentials

Craft fairs are bustling events where creativity shines, and artisans share their unique creations with the world. Whether you're a seas...