Are you ready to add a personal touch to your holiday decor this year? DIY crafts are not only a fun way to get into the festive spirit but also a fantastic way to create unique, budget-friendly decorations. Whether you're decorating for Christmas, Hanukkah, or another holiday, here are three easy holiday DIY crafts with step-by-step instructions:
1. Festive Pinecone Ornaments:

Materials:
- Pinecones or Baby Coconuts
- Craft paint in holiday colors
- Twine or ribbon
- Glitter (optional)
**Instructions:**
1. Start by cleaning your pinecones/coconuts to remove any dirt or debris.
2. Paint the tips of the pinecones with your chosen holiday colors. You can go for classic red and green, elegant silver and gold, or any combination that suits your theme.
3. While the paint is still wet, sprinkle some glitter over the painted areas for a touch of sparkle.
4. Let the paint dry completely, usually for about 1-2 hours.
5. Attach a piece of twine or ribbon to the top of each pinecone/coconut for hanging.
6. Hang your pinecone ornaments on your tree or around your home for a rustic and charming holiday touch.
2. Handmade Holiday Cards or Tags:

Materials:
- Blank cards or cardstock
- Markers, colored pencils, or watercolor paints
- Stamps and ink pads
- Stickers, washi tape, or decorative paper
- Glue or double-sided tape
**Instructions:**
1. Fold your blank cards or cut your cardstock to the desired card size.
2. Let your creativity flow by decorating the front of each card with holiday-themed drawings, paintings, or stamped images.
3. Use stickers, washi tape, or decorative paper to add extra flair to your cards.
4. Write heartfelt messages inside your cards.
5. Allow the ink and decorations to dry, then send them to friends and family to spread holiday cheer.
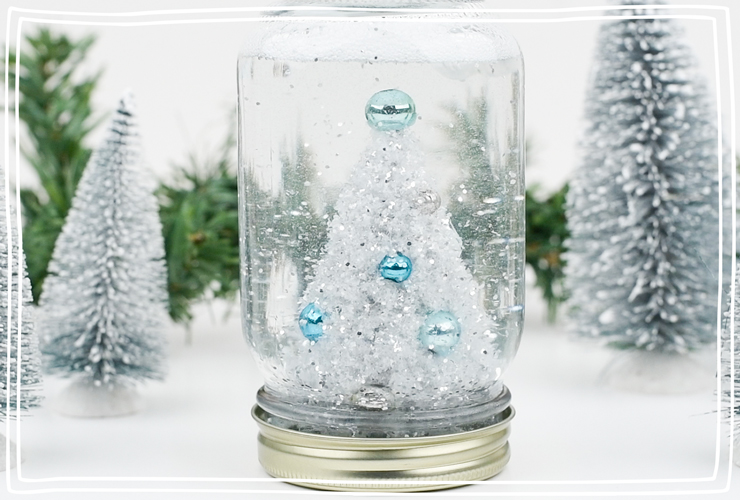
3. Mason Jar Snow Globes:
Materials:
- Mason jars with lids
- Figurines or miniatures
- Craft glue or hot glue gun
- Water
- Glycerin (optional)
- Glitter
- Ribbon or Twine
**Instructions:**
1. Securely glue your chosen figurines or miniatures to the inside of the Mason jar lid. Let the glue dry completely.
2. Fill the Mason jar with water, leaving a small space at the top.
3. Add a pinch of glitter to the water. You can also include a drop of glycerin for a slower snowfall effect.
4. Carefully screw the lid with the figurines onto the jar, ensuring it's tightly sealed.
5. Turn the jar upside down, and watch the snowfall around your figurines.
6. Decorate the outside of the jar with ribbon or twine to make it extra festive.
These holiday DIY crafts are not only enjoyable to create but also make thoughtful gifts or decorations for your own home. Get crafting and make this holiday season extra special with your handmade touches! 🎄🎁✨ #DIYHolidayCrafts #HandmadeDecorations
Happy Crafting!


